Here is a picture of the same wire (this was a 36" floor) further away from the moisture. You can see if the rabbit wasn't urinating on it in one corner over and over that it would have lasted longer before needing to be removed:
Ideally, I wanted galvanized after for my cages. Unfortunately, we were not able to locate affordable galvanized after wire in 14 gauge (preferred- it is thicker) or 16 gauge locally and it is quite pricey anyway before having to pay significant shipping charges for motor freight (the rolls are big and heavy). We ended up going with galvanized before wire and were able to get free shipping on a sale. We will have to replace these sooner, but hopefully by then I will have a hanging set-up and it will be easier. Here is a picture of the new roll:
If at some point, you have to replace the wire on the floors, step 1 is to have a strong person to "supervise," haha. I am joking because this is totally do-able by one person, but I have lifting restrictions at the moment so that was my step one. For removing the old floor, a longnose pliers was used. There are clip removal tools available, but for old floors it really isn't necessary as the metal is weak anyway. They can basically just be uncurled with very little time. However, if stainless steel j-clips are used then they will probably need something else entirely (I've never used them before). Because the floors were in a stacker set-up, we had to curl back the prongs holding each cage in place to pull the floor out.
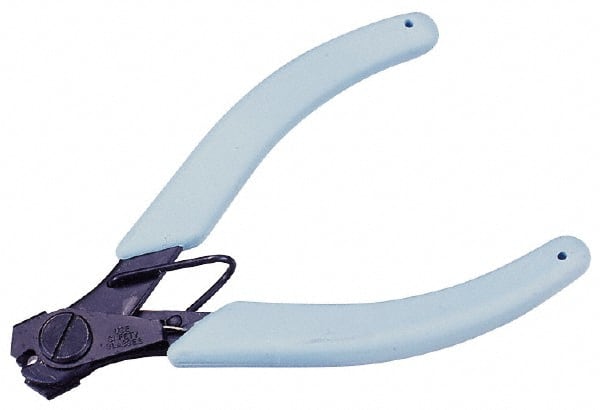
Once the old floors are removed, we used them as stencils for the new floor by laying them underneath and unrolling the new wire on top to match the rows/columns up. You can just measure, but be careful as one side will be shorter if you don't add length to accommodate the cuts. We used a wire cutting tool to snip the wire to match. Wear gloves! This step can and will make for sore hands. Our tool looks like this, but there are other styles/types also:
After the cuts are made, the wire should be placed so the bow is facing up. That also keeps the part with the welded edges facing down, away from tender rabbit feet. If you aren't sure which side is up, feel it with your hands and you will know immediately. Once in place, j-clips were applied to the edges. I usually put them every few inches to provide strength, though I've seen some people space them out more. I think you can get away with this more when you have the thicker, stronger 14 gauge floor wire. Installing new floors (these are on rabbit stackers from KW Cages, by the way):
And finished!
Just need to burn any little hairs off. While working on this, we went ahead and sanitized the j-feeders, waterers, and resting mats, so they need to be returned before any rabbit is placed inside. I've also spent way too much time trying to come up with an idea for new cage pans. We were going to try to make slant boards with gutters, but without having the required space between each cage, there wouldn't be enough of an angle. We would have to build a whole new rack for that and it isn't an option until we know where we will be later this year. So I finally caved and ordered 3 new 36" Duratrays. Even with a discount, it cost over $100, but I know they will last a lifetime. I regularly abuse my other Duratrays by bleaching, vinegar washing, leaving them out in the sun or the cold, and they never corrode, lose their shape, or fall apart. Unlike ALL of the galvanized trays that I eventually had to throw away. Never again!
If you made it this far, here is a cute picture of a fuzzy wuzzy baby face as a reward:
Hope you are having a great week in the (finally) warmer weather. Or did I speak too soon?


And a cute, fuzzy baby face it is! :) Glad you are taking advantage of the weather! It's been truly beautiful here the past few days!
ReplyDelete